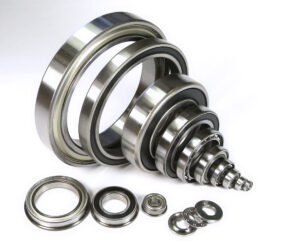
Stamping a low-quality metal with a high-quality machine tool probably wouldn’t result in success. But how many operators, unaware of the low-grade material, would blame the machine tool? This event serves as a reminder that pinning the blame on the wrong thing, in any scenario, simply isn’t helpful. But as Chris Johnson managing director of SMB Bearings explains, similar scapegoating also takes place with bearings.
As a bearing rotates, one ring usually experiences load at all points of its circumference. Depending on the application, this could be the inner ring or outer ring. In this case, the inner ring will have a tendency to rotate around the shaft, or the outer ring will rotate inside the housing and cause wear to both bearing and shaft or housing. This movement is also known as “creep”.
The right fit
The shaft or housing must be machined to the correct tolerances to ensure a suitably tight fit to prevent this from happening. A tight shaft or housing fit is also needed where a lot of vibration exists — this prevents the vibration from causing the bearing to move within its mountings. Tight fits are also often used to provide extra support to the inner or outer ring if the bearing is subjected to a very heavy load. In addition, tighter than standard fits are recommended where accurate rotation is needed.
Where a tight fit is used, the act of pressing a bearing on to a shaft, or into a housing, will smooth the surface of the shaft or housing by removing a small amount of surface metal. This has the effect of either making the shaft slightly smaller, or the housing slightly larger.
Ground surfaces are affected less by the pressing process. Turned — or lathed — surfaces are affected more as the initial surface finish is rougher. A hollow shaft may be compressed more easily, which means that the resulting fit is not as tight as with a solid shaft. A thin housing will be stretched more easily than a thick housing, so the resulting housing fit may be looser with a thin housing. All of these factors must be considered by the bearing user before deciding on the shaft and housing tolerances.
If a tight fit is required, the shaft or housing tolerances must be carefully checked against the internal clearance of the bearing. For example, an ‘interference’ shaft fit is where the shaft is actually bigger than the bearing inner ring. A lot of force is required to fit the bearing on to the shaft, which stretches the inner ring around the shaft. This slight increase in the size of the inner ring causes a reduction in the bearing’s internal clearance.
If the bearing’s internal clearance is not large enough to cope with this reduction, the bearing may not be able to rotate after fitting and will fail quickly. In these cases, a larger internal bearing clearance — or radial play — should be specified. A very tight fit in a housing has the same effect.
Temperature can also affect the shaft or housing tolerance. A shaft may expand more than a bearing ring because the shaft material expands more at high temperatures. This could happen with an aluminum shaft and a steel bearing, due to the different material properties. If this happens, the internal clearance is reduced just as it is with a very tight interference shaft fit. If the housing expands more than the bearing’s outer ring, the housing fit becomes looser.

Case in point
Bearings are made to very close tolerances and where fitting problems occur, as SMB Bearings has experienced with its own customers, it’s usually the shaft or housing tolerances that are wrong. We have returned bearings to the factory a number of times for inspection, only to find that they are within tolerance.
Bearing manufacturers use air gauges to check bearing dimensions. These are accurate to half of one-thousandth of a millimeter or better. If the shaft or housing manufacturer does not have measuring equipment to the same accuracy, the shaft or housing dimensions are likely to be less accurate than the bearing dimensions and problems will likely occur.
Shaft and housing tolerances also control roundness. The roundness of a bearing ring is closely controlled. If a bearing is fitted to an out-of-round shaft or housing, the bearing ring could be distorted from its initial “round” state and assume the poor roundness of the badly made shaft or housing. A bearing relies on good roundness to run quietly so, when this happens, the bearing becomes noisy. The shaft or housing roundness is even more important for thin section bearings, as the thinner rings are distorted much more easily.
This all demonstrates that shaft and housing tolerances are important to bearing performance. If customers are aware of the effect that shaft and housing tolerances have on the performance of a bearing, they will put more effort into making sure that these tolerances are correct in the first place. When problems occur, they should consider accurately the checking shaft and housing dimensions, material, and vibration levels, before blaming the bearing.
Measurement matters
Imagine the following scenario: a design engineer is developing a new power tool. They decide on shaft and housing sizes and tolerances and submit an order for 500 bearings to suit these dimensions. The bearings arrive and are installed into the new power tool — and the design engineer has high hopes that this product will go to market within a year. However, these hopes are soon dashed as testing trials of the product are not successful. The business concludes that the bearings had caused the failure. The design engineer writes a strongly worded email to the bearing supplier. The letter explains that the batch of bearings are “no good” and they are disgruntled by the delays in bringing this product to market!
The bearing supplier sends a complaint to the bearing manufacturer and returns bearings for inspection. The factory checks the bearing dimensions with highly accurate measuring equipment and report that the bearings are well within tolerance. On receipt of the tolerance report, the customer re-checks the shaft and housing tolerances and finds that they are not within specification. The problem is then corrected but several weeks have been wasted.
If other components are not manufactured to the same levels of precision as the bearings, the bearings will not perform adequately in the final product. When the bearings inevitably fail, at no fault of the bearing manufacturer, it can only be human nature to blame the bearings.
A design engineer must carefully define the tolerances of the shaft and housing dimensions. The tolerances of each must be equally as tight as the tolerances of the bearing. After all, even the most consistent and precise bearings will be unable to contend with inconsistent shafts that have wide variation.
The bearing factory can give guidance on shaft and housing tolerances. The design engineer should be able to provide relevant information such as radial load and axial load, which bearing ring rotates, rotating speed in rpm, which bearing ring is loaded at all points, installation and operating temperature, shaft and housing material (turned or ground), solid or hollow shaft and the thickness of the housing. This information allows the bearing factory engineers to recommend shaft and housing tolerances for best performance.
The design engineer would then need to accurately check the shaft and housing tolerances to make sure they are to specification. This should be done with the most precise measuring equipment: air gauges, ring gauges or plug gauges. While not all businesses will have an air gauge to hand, outsourcing this parts inspection to a third party could pay dividends in the long run — particularly as it ensures the bearings are a perfect match for the tool.
Removing human error
Air gauging is a high-resolution, non-contact measuring system that uses air jets to provide fast and accurate dimensional measurements. It’s highly adaptable to measuring bearings and shaft sizes, to ensure both are made to the correct tolerance levels. Shaft and housing suppliers may already use this equipment in quality control, but it is worth checking how measurements were obtained.
The bottom line is engineers must choose their measurement methods carefully. They should put as much onus on shaft and housing tolerances and roundness as they put on bearing tolerances and roundness. If things do go wrong, and it seems that bearing failure has taken place, SMB is always happy to have bearing tolerances re-checked by the factory but it may save time if checks are also carried out on other components and variables in the system that may have contributed to the failure.
That’s not to say it’s never the bearing manufacturer’s fault. As with all product markets, some bearings aren’t made to high manufacturing standards. That’s why it’s crucial to choose bearing brands carefully. EZO bearings from Japan are a good bet, as this manufacturer truly understands all aspects of tolerance, from mean bore deviation to outer ring runout.
If engineers take a more holistic approach to bearing performance when testing products, they should save valuable time and effort, especially if trials don’t go to plan. The use of improved measurement methodologies can save time that would otherwise be wasted on returning and reordering bearings in cases where other components are at fault.
SMB Bearings
www.smbbearings.com

